
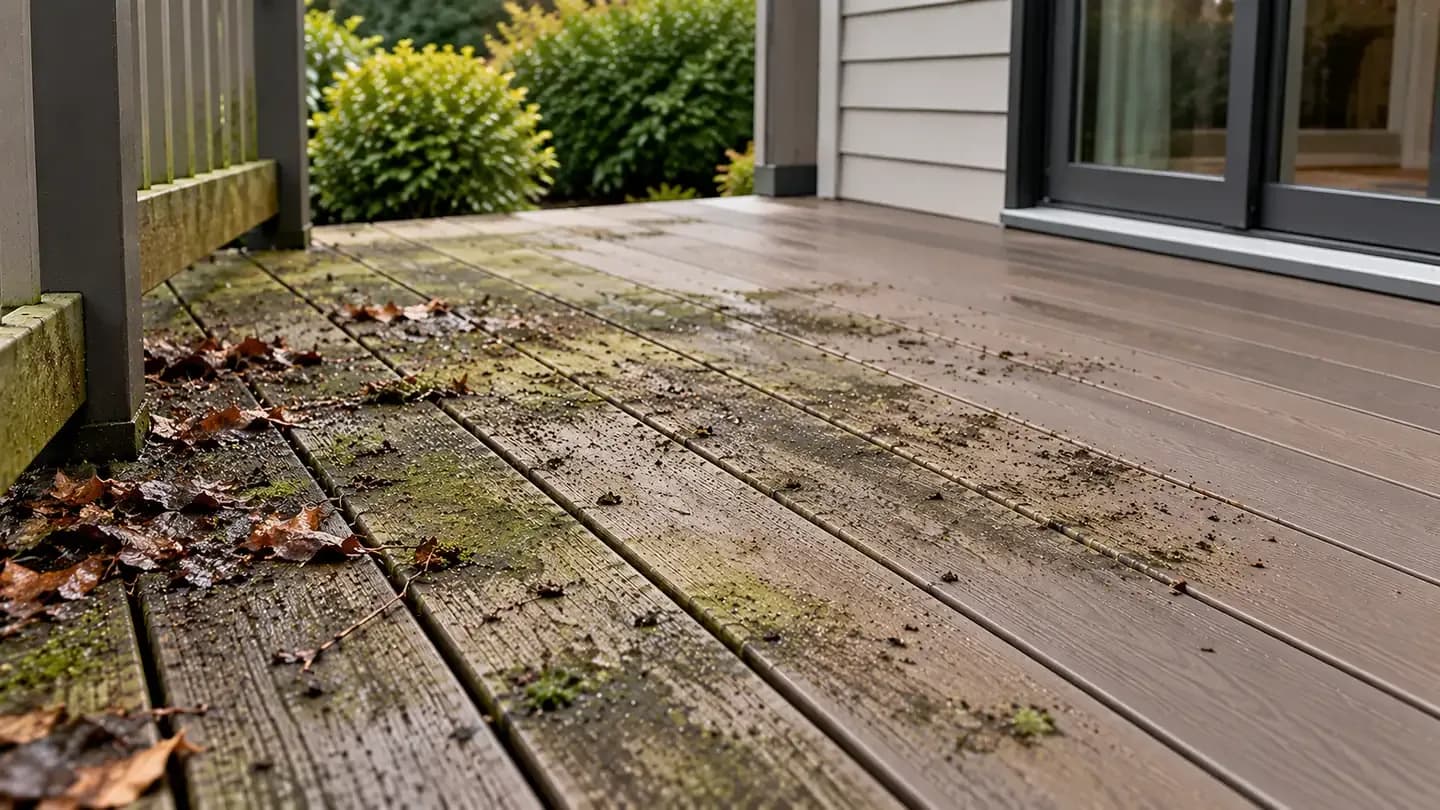
To clean a deck before staining, begin by inspecting the timber and identifying any previous coating. Repair damaged areas, remove loose dirt, apply the correct deck cleaner or stripper, scrub the boards evenly and rinse away every trace of residue. Allow the timber to dry fully, then sand where necessary and test its absorbency before applying the stain.
The stain will only perform as well as the surface beneath it. If dirt, algae, old coating or moisture remains in the timber, even a good-quality product may dry unevenly, struggle to penetrate or begin failing earlier than expected.
The most important part of staining a deck is therefore not the staining itself. It is creating a surface that is clean, sound, dry and evenly absorbent.
Why Cleaning a Deck Before Staining Matters
Decking is constantly exposed to rain, sunlight, foot traffic and organic debris. Over time, the boards collect soil, pollen, grease and weathered fibres. Shaded areas may also develop algae, fine mosses or mildew.
These deposits create a barrier between the timber and the new stain. Instead of bonding with or penetrating the wood evenly, the product may sit partly on contamination. This can produce dark patches, light areas, sticky sections or premature coating failure.
Previous treatments create another complication. A deck may look bare while still holding traces of oil or stain within the grain. If the new coating is not compatible with what remains, cleaning alone may not be enough.
Proper preparation gives the stain a consistent surface. It also reveals the true condition of the boards, allowing repairs to be completed before they disappear beneath a fresh colour.
Does Every Deck Need the Same Preparation?
No. The correct preparation depends on the timber, its condition, its coating history and the finish you intend to apply.
A relatively new, previously untreated deck may only need suitable weathering, cleaning and light surface preparation. An older deck with algae and grey fibres may require a deeper clean and selective sanding. A deck covered with peeling paint, oil or stain may need stripping before it can accept a new treatment evenly.
This is why the process should begin with an assessment rather than a tin of cleaner. At Chiltern Surface Co, our surface-specific approach considers the material, contamination, condition and risks before a restoration method is selected.
Inspect the Deck Before You Start
Examine the decking while it is dry and in good daylight. Dirt and old coating can hide damage, so take time to look at the boards from several angles.
Walk over the entire area and notice whether any section moves or feels soft. Check board ends, steps, railings and the places where fixings enter the timber. Raised screws, loose boards and splinters should be dealt with before cleaning.
Dark staining does not always mean the timber is rotten. It may be biological growth, trapped moisture or discolouration from metal. However, wood that feels soft, crumbles easily or has lost structural strength needs repair rather than cosmetic treatment.
Stain does not strengthen decayed timber. Applying it over damage may temporarily improve the colour, but it will not correct the underlying problem.
Identify What Is Already on the Deck
Before choosing a cleaner, determine whether the boards are bare, oiled, stained or painted.
This may be obvious on a recently treated deck, but older finishes can be difficult to recognise. Areas beneath furniture often provide clues because they receive less sunlight and foot traffic. Board edges and spaces beneath railings may also retain more of the original coating.
Previously stained decking
A sound, compatible stain may only require cleaning and preparation according to the new product’s instructions. If the old stain is peeling, flaking or uneven, however, applying another coat over it is unlikely to produce a reliable finish.
A darker stain may also remain visible beneath a lighter or more transparent product. Cleaning will not necessarily remove that colour.
Previously oiled decking
Oil penetrates the timber rather than behaving exactly like a surface film. Residual oil can prevent some stains and paints from bonding or absorbing evenly.
If you are changing from oil to another type of finish, check both manufacturers’ compatibility guidance. Stripping, weathering or sanding may be required before the new product can be applied.
Painted decking
Loose or flaking paint needs to be removed. Cleaning can wash away dirt and weak fragments, but it will not create a stable surface where the remaining paint has poor adhesion.
If the new finish is translucent, the previous paint must normally be removed much more thoroughly because any remaining patches will show through.
Never-stained decking
Previously untreated decking may appear straightforward, but age and weathering still affect preparation. Grey fibres, algae and surface contamination can prevent an even finish.
New pressure-treated timber may also contain moisture or treatment residue. Do not assume that it is ready to stain immediately. Follow the timber supplier’s and stain manufacturer’s guidance regarding weathering and moisture.
Cleaner, Stripper, Brightener or Sanding?
These terms are often used as though they describe the same process. They do not.
Understanding the difference prevents unnecessary work and helps avoid chemical combinations that may damage the timber.
What does a deck cleaner do?
A deck cleaner is intended to remove surface dirt and, depending on its formulation, biological contamination such as algae and mildew. Some products also help lift weathered material from bare timber.
A cleaner is suitable when contamination is the main problem and the existing finish is either absent or compatible with the next coating.
It should not be expected to remove every old stain, oil or paint. If a cleaner leaves sound coating behind, that does not necessarily mean it has failed. Coating removal may simply require a different product.
When is a deck stripper needed?
A stripper is designed to soften or remove certain existing finishes. It may be necessary where the previous coating is peeling, incompatible with the new stain or too uneven to overcoat successfully.
Not every stripper works on every coating. A product intended for oil-based treatment may behave differently on paint or a water-based stain. Identify the coating as accurately as possible and follow the stripper manufacturer’s instructions.
Applying more stripper or leaving it on longer than directed is not a substitute for choosing the right product.
What is a wood brightener?
A wood brightener is not simply a stronger cleaner. It is commonly used to address particular discolouration, improve the appearance of weathered timber or form part of a specified cleaning and restoration system.
Some brighteners are acidic and may be used after an alkaline cleaner or stripper when the product system requires it. The stages must remain separate.
Never mix a cleaner, stripper and brightener together. Rinse as instructed between products and use only combinations approved by their manufacturers.
Does the deck need sanding?
Sanding addresses physical surface problems that washing cannot resolve. It may be needed to remove stubborn coating, smooth raised fibres, reduce splinters or create a more even surface before staining.
Not every deck needs to be sanded back completely. A sound deck with no failed coating may only require light, selective preparation. By contrast, a deck with extensive flaking or severe colour variation may need more consistent sanding across the full visible area.
Sanding only a few random patches can create different levels of absorbency. Those differences may become more obvious when a translucent stain is applied.
What Is the Best Cleaner Before Staining?
The best cleaner is one that is suitable for the timber, compatible with its current coating and approved as preparation for the stain you plan to use.
A specialist decking cleaner provides clearer instructions than an informal homemade mixture. The label should explain where it can be used, how much to apply, how long it needs to work and how thoroughly it must be rinsed.
Mild soap may be sufficient for recent surface dirt, but it may not remove established algae, grease or weathered fibres. It must also be rinsed away completely because residue can interfere with stain absorption.
Oxygen-releasing timber cleaners may be useful for certain types of organic contamination on suitable wood. Chlorine-based products, acids and strong alkaline mixtures require greater caution because they may affect timber fibres, coatings, metals, plants and surrounding materials.
Vinegar, washing-up liquid, baking soda and household bleach are frequently recommended online as universal answers. None should be treated as automatically suitable. The fact that a chemical is readily available does not mean it is compatible with every timber species or coating system.
Use the stain manufacturer’s preparation products where practical. When products from different systems are combined, confirm their compatibility before applying them to the deck.
What You Need to Clean a Deck Before Staining
Gather the equipment before starting so that the cleaner can be applied, agitated and rinsed within its specified working time.
You will generally need a broom, a non-metallic deck brush, a garden hose, a suitable cleaner and protective gloves and eyewear. Depending on the deck’s condition, you may also require a compatible stripper, scraper, sanding equipment, dust extraction and a moisture meter.
Avoid using a wire brush for general cleaning. Metal bristles can damage softer timber and small fragments may remain behind, later causing staining when exposed to moisture.
How to Clean a Deck Before Staining Step by Step
1. Check the weather and plan the full job
Choose a period that allows time for cleaning, drying and staining rather than focusing only on the day of application.
Cleaner can dry too quickly in strong sunlight. Rain may dilute the solution or delay drying. High humidity and shade can keep timber damp long after the surface appears dry.
Read the cleaner and stain instructions before beginning. Work backwards from the intended staining day so the deck has enough time to dry properly.
2. Remove furniture and protect the surroundings
Clear the entire deck. Move furniture, barbecues, outdoor rugs, pots and decorative objects to another area rather than cleaning around them.
Close nearby windows and doors. Protect plants and any vulnerable walls, glazing, metals or electrical fittings according to the cleaning product’s instructions.
Consider where the dirty water will travel. Cleaner and loosened coating should not be allowed to enter ponds or collect beside the building.
3. Complete necessary repairs
Secure loose boards and address raised fixings using methods suitable for the deck’s construction. Replace timber that is rotten or no longer structurally sound.
Remove large splinters and deal with sharp edges before wet cleaning. If extensive repair is required, complete it before preparing the surface for stain so the replacement boards can be included in the same assessment.
New timber may not absorb stain in exactly the same way as older weathered boards. A test area is particularly important where repairs introduce new material.
4. Sweep the deck thoroughly
Remove leaves, dust, soil, pollen and loose coating with a broom. Pay close attention to corners, steps, railings and the gaps between boards.
Cleaning solution works more effectively when it is not being absorbed by layers of loose debris. Clear gaps also help the dirty water drain away during rinsing.
Inspect the deck again after sweeping. Problems hidden beneath leaves or outdoor rugs are often easier to see at this stage.
5. Test the surface and cleaning product
Apply the cleaner to a small, inconspicuous section using the recommended dilution and method. Include an area of previous coating if one is present.
Allow the stated dwell time, agitate and rinse. Once the test area dries, check its colour, texture and absorbency.
If the coating softens unevenly, the timber becomes rough or the colour changes unexpectedly, stop and reassess the product. A successful wet test is not enough because important differences may only appear after drying.
6. Strip an incompatible or failed finish
If the previous coating must be removed, complete that process before ordinary cleaning and final preparation.
Apply the compatible stripper according to its instructions and work in manageable sections. Do not allow it to dry unless the manufacturer permits this. Remove the softened finish using the recommended tools without gouging the timber.
Some areas may require a second application. Trying to compensate with aggressive scraping or excessive water pressure can damage the boards.
Rinse or neutralise the stripped surface exactly as directed before moving to the next product.
7. Apply the deck cleaner evenly
Apply the cleaner across complete boards or logical sections. Treating only visible marks can produce a patchy result because the cleaned timber may absorb stain differently from the surrounding area.
Allow the correct dwell time. The solution needs time to loosen the contamination, but leaving it on longer than instructed may affect the wood or allow residue to dry.
Keep track of sunlit edges, which may dry faster than shaded sections. Work on a smaller area if necessary.
8. Scrub with the grain
Agitate the cleaner using a suitable non-metallic brush. Work methodically along the direction of the boards and pay attention to grooves, corners and areas that were beneath furniture.
Use enough pressure to release contamination without tearing the timber fibres. If one mark does not respond, identify it rather than scrubbing harder indefinitely.
Grease, rust, tannin staining and biological growth may each need different treatment. One cleaner cannot be expected to solve every form of discolouration.
9. Rinse away all residue
Rinse the deck thoroughly with clean water. Work towards the natural drainage direction and continue until the run-off is clear and free from cleaning residue.
Cleaner left in the timber may affect the colour, drying or adhesion of the stain. Residue trapped in grooves and between boards can also reappear as the deck dries.
If a pressure washer is used for rinsing, it should only be used when the timber is suitable. Select a wide fan, begin at a generous distance and use the lowest effective pressure. Uneven passes or working too close can raise the grain and create marks that become visible after staining.
Manual cleaning and a garden hose may be preferable for older, softer or already damaged timber.
10. Use a brightener only when appropriate
If the selected restoration system calls for a brightener, apply it as a separate stage after the cleaner or stripper has been rinsed away.
Follow its instructions for dilution, application, dwell time and final rinsing. Do not treat it as an optional ingredient to add to the cleaning solution.
Allow the timber to dry before judging the result. Brightening may improve certain colour differences, but it cannot disguise deep damage or remaining patches of coating.
11. Allow the timber to dry completely
Do not stain a deck simply because the surface no longer looks wet.
Moisture can remain within the timber, especially in grooves, board ends and shaded areas. Weather, humidity, airflow and the amount of water used during cleaning all influence drying.
Follow the stain manufacturer’s moisture requirement. A moisture meter provides more useful information than relying entirely on a fixed waiting period.
Some manufacturers also recommend a simple water-drop test: if clean water beads on the surface rather than soaking in, the timber may still be damp or may contain a previous water-repellent finish. This test is only an indication and should not replace the coating instructions.
12. Sand and remove the dust
Once dry, inspect the boards for raised grain, splinters and remaining coating. Sand where necessary using a method appropriate for the timber and the stain.
The aim is not to polish the deck until it cannot absorb product. It is to create a sound, consistent surface.
Remove every trace of sanding dust from the boards and gaps. Dust left behind can mix with the stain and produce a rough or uneven finish.
13. Test the stain before full application
Apply a small amount of stain to an inconspicuous area and let it dry.
The test reveals more than colour. It shows whether the stain is absorbing evenly, whether the old treatment remains visible and whether the final appearance is acceptable on that particular timber.
Translucent stains reveal more of the underlying grain and preparation differences. A darker or more opaque finish may disguise some colour variation, but it should not be used to cover an unstable surface.
Should You Pressure Wash a Deck Before Staining?
Pressure washing is optional, not compulsory.
On suitable, sound timber, controlled pressure can help rinse away loosened contamination. However, using pressure as the main cleaning force can open the grain, create visible lines and drive water into vulnerable areas.
The cleaner and agitation should do most of the work. If the deck will only come clean when the lance is held very close, the process needs to be reassessed.
Older softwood, splintered boards and delicate coatings may be better prepared with a cleaner, brush and garden hose. A slower method can be worthwhile if it avoids sanding damage caused by aggressive washing.
Does a Never-Stained Deck Need Cleaning?
Yes. Timber that has never been stained may still contain weathered fibres, treatment residue, dirt and biological growth.
New decking may also be too damp or freshly treated to accept stain immediately. The appropriate weathering period varies according to the timber and its original treatment, so follow the supplier’s guidance rather than assuming every new deck should wait the same number of months.
An older unstained deck that has turned grey may need more than routine washing. Cleaning removes contamination, while a compatible timber-restoration product or sanding may be needed to address uneven weathering.
Grey colour alone does not necessarily mean the deck is damaged. Timber naturally changes appearance outdoors. The preparation should be based on condition and the intended finish rather than colour alone.
Do You Have to Remove All the Old Stain?
That depends on the condition and compatibility of the existing stain.
If the old coating is sound, firmly bonded and compatible with the new product, the manufacturer may allow it to be cleaned and recoated. If it is peeling, flaking or patchy, the loose material must be removed.
Complete removal is often necessary when changing product type, moving from a dark finish to a lighter translucent stain or correcting widespread coating failure.
Leaving isolated patches of old stain can affect both colour and absorption. The new finish may look darker over coated areas and lighter where the timber is bare.
When the coating history is unknown, testing and careful assessment are more reliable than assuming a new stain will conceal everything.
What Happens If You Stain a Dirty Deck?
Stain applied over dirt, algae or cleaner residue may not penetrate or bond evenly.
Initially, the surface may look acceptable because the fresh colour hides minor contamination. As it dries and weathers, however, the underlying preparation differences can become visible.
Possible problems include patchy colour, slow drying, sticky areas and early peeling or flaking. Biological growth left beneath a coating may also continue to affect the appearance.
Applying additional stain rarely corrects poor preparation. It may deepen the colour while trapping the original problem beneath another layer.
How Dry Should a Deck Be Before Staining?
The deck should meet the stain manufacturer’s moisture requirement throughout the area being coated.
There is no universal waiting time. A deck cleaned during warm, breezy weather may dry faster than one in deep shade after several humid days. Board thickness, timber density and airflow beneath the structure also matter.
Check several locations rather than assuming the whole deck dries evenly. Areas beside walls, beneath railings and in permanent shade may retain moisture longer.
Do not stain if rain, dew or unsuitable temperatures are expected during the product’s application and curing period.
Common Deck Preparation Mistakes
Treating cleaning and stripping as the same job
Cleaner removes contamination. Stripper addresses an existing finish. Using the wrong product may leave the real barrier untouched.
Cleaning only the darkest areas
Patch cleaning can create uneven colour and absorption. Prepare complete boards or the full deck when it is being stained.
Increasing chemical strength without testing
A stronger mixture may damage fibres, alter colour or affect nearby materials. Follow the approved dilution and repeat the correct process if the manufacturer permits.
Allowing cleaner or stripper to dry
Dried residue can be difficult to remove and may create uneven results. Work in sections small enough to control.
Applying stain before the timber is dry
Surface dryness does not confirm that the boards are ready. Check the manufacturer’s moisture requirements and inspect shaded areas separately.
Skipping repairs
Stain is decorative and protective; it is not structural. Loose, rotten or unstable boards must be addressed before coating.
Ignoring product compatibility
Oil, paint and stain behave differently. A new product may not perform properly over an incompatible previous treatment.
Assuming more stain means more protection
Applying too much can slow drying, create sticky areas and produce an uneven finish. Follow the stated coverage and number of coats.
When Is DIY Preparation Reasonable?
Preparing a deck for staining can be a manageable DIY job when the timber is sound, the previous finish is known and the manufacturer’s instructions are clear.
A homeowner can often complete routine cleaning, light sanding and recoating successfully by working patiently and testing each stage.
Professional help becomes more useful when the coating history is uncertain, several products have built up or the deck is extensively weathered. It may also be appropriate where there is heavy biological contamination, difficult access, drainage concerns or previous pressure-washing damage.
The value of professional assessment lies in choosing the correct process, not simply using more powerful equipment. Chiltern Surface Co provides specialist exterior cleaning and Surface Restoration services selected according to the material and condition of each surface.
Good Staining Begins Before the Tin Is Opened
Understanding how to clean a deck before staining is really about preparing the timber to receive a new finish evenly.
The deck must be sound enough to treat, free from biological growth and dirt, compatible with the new product and properly dry. Cleaner, stripper, brightener and sandpaper each solve different problems. Using the right one at the right stage is more effective than relying on one aggressive process.
A well-prepared deck gives the stain the best opportunity to penetrate or bond as intended. Poor preparation asks the coating to hide problems it cannot solve.
If the existing finish is difficult to identify or the timber has become heavily weathered, Chiltern Surface Co can assess the surface and recommend a proportionate restoration process.
We work throughout Buckinghamshire, Berkshire and Oxfordshire, providing careful, surface-specific advice without pressure to proceed.
Frequently asked questions
What is the best way to clean decking before staining?
Inspect and repair the deck first. Identify the existing finish, then use a cleaner or stripper compatible with the timber and new stain. Agitate the product evenly, rinse thoroughly and let the boards dry to the coating manufacturer’s requirements. Sand remaining roughness or unstable coating before removing all dust and testing the stain.
Can I use washing-up liquid before staining a deck?
Mild soap may remove light dirt, but it is not designed for every type of biological growth, grease or coating residue. It may also leave surfactant residue if not rinsed thoroughly. A preparation product recommended by the stain manufacturer provides a more predictable result.
Should I sand or clean a deck before staining?
Most decks need cleaning. Sanding depends on the surface condition. Sanding may be necessary where fibres are raised, splinters are present or the previous coating remains uneven. It should not replace cleaning because sanding dirty timber can drive contamination into the grain and clog the abrasive.
Can I stain over an old deck stain?
Only when the old coating is sound and compatible with the new product. Loose, peeling or incompatible stain must be removed according to the manufacturer’s preparation instructions. Always test the new colour because the existing finish may affect its final appearance.
How long after cleaning can I stain the deck?
Wait until the timber meets the stain manufacturer’s moisture requirement and suitable weather is available for application and curing. Do not rely solely on a fixed number of hours. Weather, shade, airflow and timber density all affect drying.
Do I need a wood brightener before staining?
Not always. A brightener may be part of a specified cleaning system or used to address certain types of discolouration. Use one only when it is appropriate for the timber and compatible with the other preparation products.
Can I clean and stain a deck on the same day?
Usually, the timber needs more drying time than a same-day process allows. Even when the surface appears dry, moisture may remain within the boards. Follow the stain manufacturer’s instructions rather than trying to complete the work to a fixed personal schedule.
How can I tell whether the deck is ready for stain?
The surface should be clean, stable, free from residue and sufficiently dry. It should also absorb the product evenly. A moisture meter and a small stain test provide better evidence than appearance alone.
Can I stain over green algae?
No. Algae and other biological contamination should be removed before staining. Coating over it may cause uneven adhesion and allow the discolouration to remain visible. Address the conditions encouraging growth as part of future maintenance.
Does pressure-treated decking need to be stained?
Not every pressure-treated deck must be stained immediately. A compatible finish may add colour or provide particular protective benefits, but the timber must first be ready to accept it. Check the timber supplier’s and coating manufacturer’s guidance regarding treatment, weathering and moisture.
Is composite decking stained in the same way as timber?
Usually not. Many composite products are designed to retain their manufactured colour and should not be treated with conventional timber stain. Follow the exact composite manufacturer’s care and refinishing instructions.